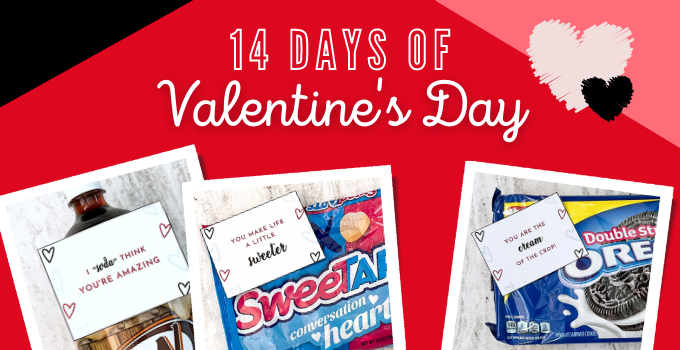
Thursday, May 23, 2013

Father's Day Poem Gift from Baby in the NICU


This isn't exactly food or kitchen related, but it's a subject near and dear to my heart. I've had two children, and both went straight to the Neonatal Intensive Care Unit (NICU) right after birth. Last June my son, Carter, was born 8 weeks early and spent the first 6 weeks of his life in the NICU before being able to come home. With our oldest, he didn't stay in the NICU over any holidays. Carter was in the NICU for both Father's Day and the Fourth of July.

It was hard having Carter in the NICU, but having him there on a holiday was especially hard. The NICU staff made Father's Day extra special for the dads by giving them the cutest little poem attached to a paper tie, with the footprint of their sweet little baby on the bottom. It was a simple and the most perfect gift my husband could receive that Father's Day. He didn't get to go home with his baby that day, but that tie with the poem and little footprint was pretty darn special to take home and cherish. 

My husband with 2-week-old Carter on Father's Day

I wanted to pass this poem on to anyone who will experience having a baby in the NICU on Father's Day this year. And I appreciate the NICU staff at our hospital for introducing it to us so we can share it with others. 

Here's what to do:

NICU moms or close family allowed in the NICU...Click HERE to download the poem and print it off on card stock. Bring it to the NICU and ask one of the nurses to stamp the baby's footprint in the blank space at the bottom of the tie. (For some reason the preview of the poem is showing up a little weird every now and then and only shows part of the poem. But it will download just fine!)

If you know someone with a baby in the NICU, this would be a great idea to tell the mom to give to her husband on Father's Day! They'll both love it. We've loved having ours and can now look at it and be reminded of those tender memories in the NICU with Carter.


Wednesday, May 22, 2013

I'm Over at Newlyweds On a Budget Today!

Today I'm guest posting over at Newlyweds On a Budget!


Kari is in fabulous NYC so I'm taking over her blog today and answering 20 questions to get to know me better. Click HERE to read all about my favorite TV show, my celebrity crush, my favorite place to shop, and more!

Tuesday, May 21, 2013

Catch Up On Those Z's with ZzzQuil!

This is a Sponsored post written by me on behalf of ZzzQuil for SocialSpark. All opinions are 100% mine.

My husband has a hard time with sleep. He wakes up a lot during the night and has tried all kinds of different remedies to fix it. It turns out there are a lot of different crazy remedies out there for sleep deprivation. We tried far more than we care to admit! But when you're that desperate for sleep, you're willing to try whatever it takes to fix it!

I was so excited when we were able to try ZzzQuil! It was something new that he had never tried before, and I was anxious to see what it would do for him. With all the failed tries before, I had my hopes set high that this had to work.

My husband was hesitant at first because he'd tried so many other options to help him sleep. What could a new over-the-counter sleep aid do for him that all the others failed at? Not only is the ZzzQuil packaging sleek and pleasing to the eye, the magical liquid inside it worked like a charm for my sleep-deprived husband! It was seriously the coolest thing. He woke up feeling more rested and like he got a full night's rest. I was so happy for him actually waking up and feeling great! ZzzQuil is amazing stuff!


Stay up to date on ZzzQuil by liking their page on Facebook!

https://www.facebook.com/ZzzQuil?fref=ts

And if you get the chance to try ZzzQuil, tweet about your experience using the hashtag #ZzzQuilNight.


*ZzzQuil gave me this product sample to try out and review. All opinions are 100% my own.

Visit Sponsor's Site

Raspberry Sweet Rolls


King Arthur Flour has been my go-to flour since I started baking a lot in college. I love all the different options of flour depending on what I'm needing to bake.

During the April Showers big kitchen giveaway a few weeks ago, I was fortunate to try a complimentary bag of King Arthur Flour. I decided to give their bread flour a try and it is now my new favorite! The King Arthur bread flour is for use in breads, rolls, pizza doughs, etc. I decided to use the bread flour to make these Raspberry Sweet Rolls and I love how they turned out. The bread flour helped them rise a little more and bake up fluffier.

I love cinnamon rolls and all kinds of sweet rolls, but I had never tried a raspberry roll until about a week ago when I decided I want to make some. Raspberries have always been one of my favorite fruits so I wasn't at all surprised when I ended up loving these sweet rolls. Serve these Raspberry Sweet Rolls for breakfast, dessert, or a treat throughout the day!

*These rolls would be great made with strawberries or blueberries as well!


Raspberry Sweet Rolls
adapted from Buns In My Oven
makes about 16 rolls

INGREDIENTS
For the Dough
  • 1 c. milk
  • 2/3 c. sugar
  • 1 1/2 Tbsp active dry yeast
  • 1 stick butter, softened
  • 2 large eggs
  • 1/2 tsp. salt
  • 4 c. King Arthur Bread Flour
 For the Filling
  • 1 - 10 to 12oz package frozen raspberries, still frozen
  • 1/4 c. plus 2 Tbsp sugar
  • 1 tsp. cornstarch
 For the Glaze
  • 1 c. powdered sugar
  • 3 Tbsp heavy cream
  • 1/2 tsp. vanilla

DIRECTIONS
Heat the milk to 95 degrees in the microwave or in a saucepan. Add the milk and sugar to a stand mix bowl. Stir together, then sprinkle the yeast over the mixture. Let it sit until foamy, about 5 minutes.

Add the butter, eggs, and salt and mix with the hook attachment on low. Beat in the flour and increase the speed to medium. Continue beating for 3 minutes, or until a soft dough forms.

Increase the speed to medium-high and beat the dough for 10 minutes.

For the dough into a ball and placed in a greased bowl. Cover with plastic wrap and place in a warm spot to rise for 1 hour, or until double in size. (A great place for a warm spot where dough can rise is in the oven with the light turned on!)

Line the bottom of a 9x13 pan with parchment paper and spray with cooking spray. Sprinkle a little flour on the counter top and place the dough ball on top. Roll into a 10x24 inch rectangle.

Combine sugar and cornstarch in a small bowl. Sprinkle the mixture evenly over the dough, leaving about an inch of space along the bottom length of the rectangle. Sprinkle the frozen raspberries over the sugar and cornstarch.

Roll the dough tightly to form a 24-inch log. Working quickly, cut the dough log in half, then cut each of those two pieces in half, making four separate dough logs. Cut each dough log into 4 evenly sized slices. Place each roll in the prepared pan, cut sides up.

Cover the pan with plastic wrap and let rise for 2 hours.

Preheat the oven to 400 degrees and bake the rolls for 20 minutes, or until golden and bubbly. Cool on a wire rack for 30 minutes before adding the glaze.

Prepare the glaze by whisking together the powdered sugar, heavy cream, and vanilla. Drizzle the glaze over the rolls and serve. Enjoy!

Monday, May 20, 2013

Crest & Oral-B Pro-Health Stages "Monsters University" Products GIVEAWAY!

We've been really lucky to have a child who loves to brush his teeth. But even his love for brushing didn't keep a few little cavities away. It doesn't help that I love to make treats and have a crazy obsession for chocolate bars! His teeth have a higher decay rate than most, and sadly (by doctor's orders) we had to get rid of the fruit snacks in our house. Bummer day for our three year old!

Going to the dentist for the very first time with my son made me so anxious. I didn't know how he would react or how scared he would be. America's ToothFairy, Crest & Oral-B Pro-Health Stages would like to help children overcome their fear of going to the dentist. (And the parents' fears of taking them!!)

Fear of the unknown can make trips to the dentist a scary time for kids. Trips to the dentist can be fun with these tips from America's ToothFairy!

  1. Visit the dentist with your child before their first appointment so they can know what to expect on their visit. Tour the office and ask the dental assistant or hygienist to explain what will be done and how each instrument will be used. This helps kids ease fears and learn a little something about dentistry!
  2. Bring children who are slightly older along with you to your cleaning visits so they can observe what is being done. They can ask questions, see how each instrument is being used, and understand the importance of taking care of teeth.
  3. Regular dentist visits help kids become familiar and comfortable with the dental team. 
  4. Reinforce concepts such as daily brushing and flossing by posting a calendar and rewarding your child a gold star or sticker for every day of excellent oral care. Help get your child excited about their next dental visit by bringing the calendar with you to show the dentist. 
  5. Allow your child to bring their favorite toy or blanket to the dentist for an added sense of comfort. (My son would love to bring his blanket to the dentist!)
  6. Bring your child's favorite book to read to them during their dental appointment. Reading can have a soothing and calming effect.
  7. Let your child wear a costume on their dental visit. This fun and special treat can help them see going to the dentist as a fun activity.

Going to the dentist with my son is going to be so much easier and more fun for him with these tips!


GIVEAWAY

With the upcoming Monsters University movie coming to theaters this summer, Crest & Oral-B Pro-Health Stages would like to give a lucky winner 2 toothbrushes and 2 tubes of toothpaste, featuring the fun-loving monsters Mike and Sulley from the movie! 


These products are new to Walmart stores. Children can start and end their days with these monsters while keeping their smiles bright and healthy! My son is a HUGE fan of "Monsters, Inc." so I'm really excited to introduce him to this new movie and these new products from Crest & Oral-B Pro-Health Stages!

Simply fill out the rafflecopter below to enter!
a Rafflecopter giveaway

Thursday, May 16, 2013

Honey-Cilantro Glazed Salmon


I had the opportunity to learn about all kinds of companies while participating in the big kitchen giveaway a couple weeks ago. One of the brands is Gourmet Garden and my life has been forever changed because of their product! I was fortunate enough to be able to try Gourmet Garden in connection with the coolers given away for the giveaway. 

These herbs have been so wonderful to use!  I love cooking with herbs and spices, but sometimes it's a pain working with them. I need just a little bit of cilantro but end up having to buy the entire bushel and waste most of it. The same goes for basil, ginger, and many others. 

Gourmet Garden is the solution I needed! Herbs are organically grown then washed, chopped, blended, and packed into tubes that you can use any time. Simply use what you need then place it back in the refrigerator. 

Today I wanted to share with you a recipe we made with Gourmet Garden herbs. It was so easy to make and the time was cut down like crazy because we weren't chopping up cilantro or garlic. I will forever be grateful for Gourmet Garden!

You can find Gourmet Garden in varieties such as Garlic, Cilantro, Basil, Ginger, and Chili Pepper in your grocer's produce department.


Honey-Cilantro Glazed Salmon
makes 4 servings
  • 4 (4 oz) salmon filets
  • 1/4 c. freshly squeezed lime juice
  • 1/4 c. olive oil
  • 1/4 c. honey
  • 2 Tbsp Gourmet Garden Cilantro
  • 2 Tbsp Gourmet Garden Garlic
  • image via gourmetgarden.com
  • 1/2 tsp. ground black pepper

DIRECTIONS

Preheat the oven to 375 degrees. Coat a baking sheet with cooking spray and set aside.

In a small bowl, whisk together lime juice, olive oil, honey, Gourmet Garden Cilantro, Gourmet Garden Garlic, and ground pepper.

Place the salmon filets skin side down on the prepared baking sheet. Pour half the sauce over the salmon and bake for 10 minutes. Pour the rest of the sauce over the salmon and bake 5 more minutes.

Switch the oven to broil and broil the salmon for 3 minutes. Spoon any extra sauce from the pan over the salmon to serve. Enjoy!

LinkWithin

Related Posts Plugin for WordPress, Blogger...